Easy DIY Origami Cat: Step-by-Step Paper Craft
DIY Cat Origami is a purr-fectly delightful way to spend some creative time! In this fun and easy tutorial from WoDIYCraft.com, we’re going to fold our way to a charming little paper cat. Imagine a sweet, upright feline with perky ears and a distinguished stance, ready to grace your desk or shelf. This project is absolutely ideal for complete beginners, children eager to try their hand at paper folding, or anyone looking for a quick and thoughtful DIY gift. You’ll have your own adorable paper companion in under 15 minutes!
Throughout this guide, I’ll walk you through each simple fold step-by-step, showing you precisely how to transform a plain square of paper into your very own origami kitty. We’ll cover basic folds and how to give your cat its distinctive shape. Get ready to unleash your inner paper artist – it’s going to be a blast!
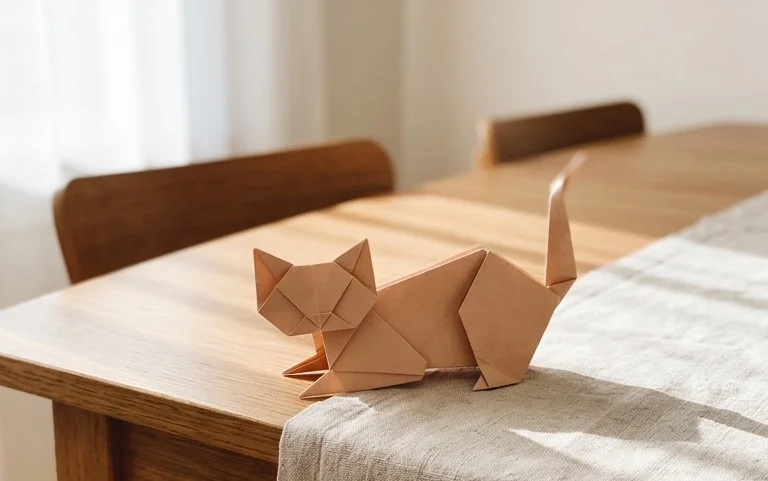
DIY Cat Origami: Free Tutorial for a Fun and Easy Craft
Welcome to WoDIYCraft.com! I’m so excited to share this super fun and surprisingly easy origami cat tutorial with you. Origami can seem a bit daunting at first, but I promise, this little cat is designed with beginners in mind. With just a few simple folds, you’ll have a charming feline friend to brighten your day. Let’s get started on this delightful craft!
Choosing Your Paper
The paper you choose can really make a difference in your origami experience and the final look of your cat. For this project, I recommend starting with a standard origami paper.
Type and Weight
Origami paper is specifically designed for folding. It’s usually thin enough to allow for multiple folds without becoming too bulky, yet strong enough to hold creases well. Regular printer paper is generally too thick and can make precise folds difficult, especially as you get further into the folding sequence. Look for paper that feels smooth and flexible. The weight of origami paper is typically measured in grams per square meter (gsm). For this cat, paper in the range of 70-90 gsm is ideal. It’s sturdy enough for clean folds but not so stiff that it’s hard to manipulate.
Size
A good starting size for this origami cat is a square piece of paper that is 6 inches by 6 inches (approximately 15cm by 15cm). This size is manageable for beginners, allowing you to practice the folds without feeling cramped, and results in a cute, palm-sized cat. If you want to make a larger cat, you can use bigger paper, and for a tiny, pocket-sized cat, use smaller paper.
Single or Double-Sided
You have a choice here, and both work well! Single-sided origami paper has a colored or patterned side and a white side. This can be great for creating a cat with a distinct colored head and body, or if you want the white side to show through in certain areas. Double-sided origami paper has the same color or pattern on both sides. This is fantastic if you want your entire cat to be one solid color, or if you’re using a pattern that you want to see on all surfaces of your origami. For a classic cat look, I often reach for single-sided paper with a nice, subtle color on the patterned side and white on the back.
The Base Folds: Building a Solid Foundation
Before we dive into making our cat, it’s important to understand a couple of fundamental origami folds. Mastering these will make the rest of the process much smoother and your finished cat much neater.
The Valley Fold
A valley fold is the most common type of fold. Imagine you’re creating a valley – the paper folds inwards, with the crease forming a “V” shape. To make a clean valley fold, align the edges or corners you need to meet *perfectly*. Then, run your fingernail or a bone folder firmly along the edge of the fold, starting from the center and working outwards. This sharp crease is crucial for accuracy.
The Mountain Fold
A mountain fold is the opposite of a valley fold. The paper folds outwards, with the crease forming an inverted “V” or a mountain peak. To perform a clean mountain fold, you often make a valley fold first, then unfold the paper and crease it in the opposite direction. Again, precision in aligning the edges or corners is key before you make the crease. A sharp crease is just as important here as with a valley fold.
Your Origami Cat Folding Sequence: Step-by-Step
Now, let’s get folding! Remember to be patient with yourself. If a fold isn’t perfect the first time, gently unfold and try again. We’re aiming for crisp, clean lines.
Start with your square piece of paper. If you’re using single-sided paper, place it colored-side down on your work surface so the white side is facing you.
1. Take the bottom edge of the square and bring it up to meet the top edge perfectly. Make a sharp valley fold across the middle. You should now have a rectangle.
2. With the rectangle still folded, take the bottom right corner and bring it up to meet the top left corner. Align these corners precisely and make a sharp valley fold diagonally across. You will now have a triangle.
3. Now, we’re going to make the ears. Take the top layer of the right point of the triangle and fold it down and slightly outwards. The tip of this fold should point towards the right side of the paper. The exact angle and position will determine the shape of your cat’s ear, so feel free to experiment a little here. Aim for a fold that creates a small, triangular flap. Make a crisp valley fold.
4. Repeat step 3 on the left side, taking the top layer of the left point of the triangle and folding it down and slightly outwards. Again, try to make this fold symmetrical to the right side. Make a crisp valley fold. These two folds form the basis of your cat’s ears.
5. Flip the entire model over. You should now see the smooth, triangular shape with the two folded-down flaps on the other side.
6. Now, let’s form the head. Take the bottom point of the triangle (the one that was the top edge of your original rectangle) and fold it upwards. This fold should go about halfway up the triangle, or a little more. This will create the face of your cat and begin to give it a more rounded head shape. Make a sharp valley fold.
7. To refine the head and create the chin, take the very tip of the flap you just folded up (the point that’s now at the top) and fold it down just a small amount. This is a very small valley fold, essentially creasing the tip of the nose area. This will give your cat a more distinct face.
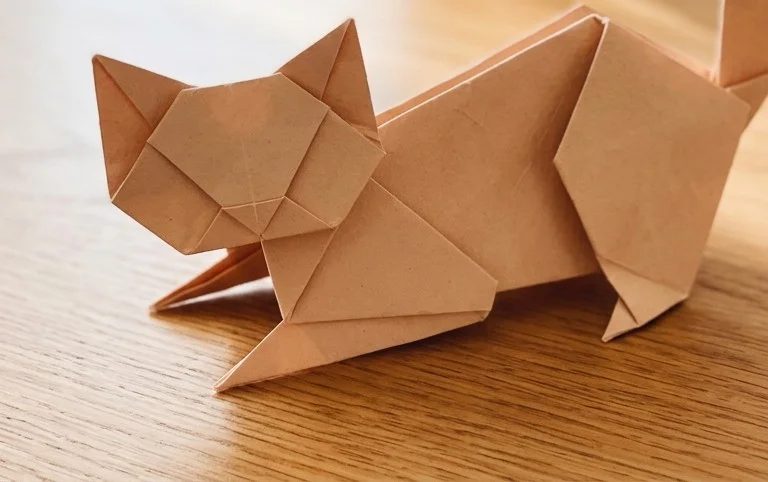
8. Turn your origami cat over. You should now see a shape that clearly resembles a cat’s head with two pointed ears and a little chin.
Congratulations! You’ve folded your origami cat!
Common Beginner Pitfalls and How to Avoid Them
Even with simple origami, there are a few spots where beginners often stumble. Don’t worry if you encounter these; they are learning opportunities!
Imperfect Alignment
* **Where beginners go wrong:** Not taking enough time to perfectly align edges and corners before making a fold. This leads to crooked shapes, uneven points, and a generally messy-looking model.
* **How to avoid it:** Be patient! Before you crease, take an extra moment to ensure that the edges are flush and the corners meet precisely. You can even gently hold the paper in place with your non-folding hand while you make the crease with your other hand. Imagine you’re fitting two pieces of a puzzle together perfectly before you press them down.
Soft or Sloppy Creases
* **Where beginners go wrong:** Not making sharp, decisive creases. This results in a model that doesn’t hold its shape well and can easily unfold.
* **How to avoid it:** Use your fingernail, the edge of a ruler, or a bone folder to run firmly along the entire length of the fold. Start in the middle and press outwards. A good crease should be crisp and defined, not soft and rounded. Think of it as making a permanent mark on the paper.
Uneven Folds (Especially for Ears)
* **Where beginners go wrong:** When folding the ears, one side is often folded more or less than the other, or at a different angle. This makes the cat’s face look lopsided.
* **How to avoid it:** Pay close attention to symmetry. When you make the first ear fold, consciously try to replicate the angle and the position of that fold on the other side. You can even hold your finger on the first ear fold as a guide when you fold the second one. Looking at your model from different angles as you fold can also help you spot any imbalances.
Varying Your Origami Cat
The beauty of origami is its versatility! Once you’ve mastered the basic fold, you can have a lot of fun experimenting.
Size
As mentioned earlier, the size of your starting paper directly dictates the size of your finished cat. Use larger squares for bigger cats, or smaller squares for miniature felines. You can even try folding a whole litter of cats in different sizes!
Paper Pattern
This is where you can get really creative! Instead of solid colors, try using patterned origami paper. You could have a cat with floral patterns, geometric designs, or even papers that look like fur textures. If you’re using single-sided paper with a white back, the white can provide a nice contrast or a subtle highlight on different parts of the cat.
Color
The color you choose is a significant way to personalize your cat. Go for traditional cat colors like black, white, grey, orange, or tabby patterns. Or, why not create a fantastical cat in bright pink, electric blue, or even rainbow paper? The possibilities are endless!
Displaying and Gifting Your Origami Cat
These little origami cats are too cute to keep hidden away! Here are some ideas for showcasing your creations or sharing them with loved ones.
Display Ideas
* **Desk Companions:** Place them on your desk, bookshelf, or windowsill to add a touch of handmade charm to your living or working space.
* **Vignettes:** Arrange a few cats together to create a charming little origami village or a cozy cat nap scene.
* **Garlands and Mobiles:** Punch a small hole at the top of each cat and string them together to create a decorative garland or mobile.
* **Table Decorations:** Use them as unique and eco-friendly decorations for parties or special occasions.
Gifting Ideas
* **Thoughtful Favors:** They make wonderful party favors for birthdays or craft-themed events.
* **Add-on Gifts:** Tuck a few origami cats into a gift box as a sweet, handmade surprise for a friend or family member.
* **Card Embellishments:** Glue a small origami cat onto a handmade card for an extra special touch.
* **Care Packages:** Brighten someone’s day by including a few handmade cats in a care package.
I hope you’ve enjoyed this origami cat tutorial! It’s such a rewarding craft, and I can’t wait to see what wonderful cats you create. Happy folding!
Conclusion
Congratulations on folding your very own DIY Cat Origami! We hope you had as much fun creating this delightful little companion as we did sharing this tutorial. Don’t worry if your first attempt isn’t purr-fect – origami is all about practice and patience. Your next fold will be even better! We’d love to see your finished creations, so feel free to share them with fellow crafters.
Ready for more feline fun? Try folding a sitting cat or a playful jumping cat next! And remember, the world of paper crafts is vast and exciting. Keep exploring WoDIYCraft.com for endless inspiration and more fun DIY projects!
