Easy Origami Ancient Dragon: Step-by-Step Paper Craft
Ancient Dragon origami awaits! Get ready to transform a simple square of paper into a magnificent, mythical creature. Imagine a majestic dragon, its scaled body coiled and ready to take flight, with a noble head and a powerful, sweeping tail. This project is perfect for those who have a little origami experience, perhaps older kids or adults looking for a rewarding challenge. While not for absolute beginners, with a bit of patience, you’ll have your dragon ready in about 30-60 minutes. We’ll be diving into some intermediate folds, learning techniques that will not only help you create this fantastic dragon but will also build your skills for future paper adventures. So grab your paper, and let’s begin this legendary fold!
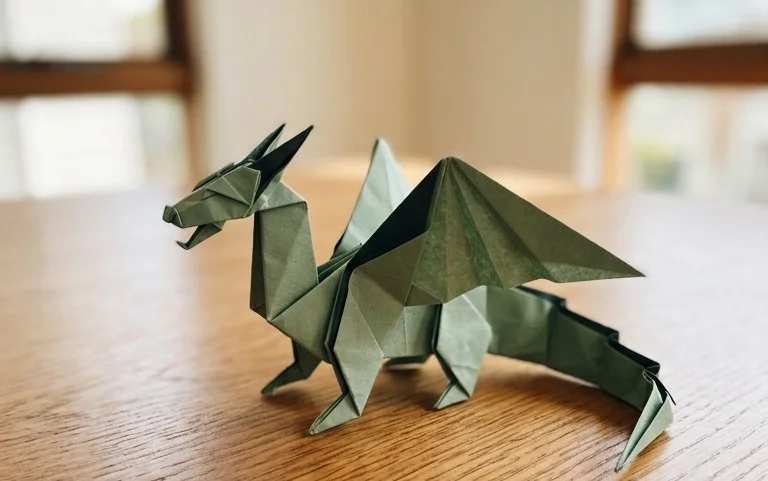
This tutorial will guide you through folding a majestic Ancient Dragon, a model that, while having a few more steps than a simple crane, is incredibly rewarding. We’ll break down each fold carefully, so even if you’re relatively new to origami, you can achieve a fantastic result. Get ready to unleash your inner dragon master!
Choosing Your Paper: The Foundation of Your Dragon
The paper you choose is crucial for a good origami experience, especially for a model like this dragon which involves shaping and some finer details.
Type of Paper
For this Ancient Dragon, I highly recommend using dedicated origami paper. This paper is specifically designed to hold crisp folds and not tear easily. It’s typically thin but strong. Standard printer paper can work in a pinch, but it’s much thicker, making it difficult to get sharp creases, especially in the later stages of the fold. If you use printer paper, I’d suggest a slightly larger starting square. Avoid cardstock or construction paper; they are far too thick.
Weight and Size
The ideal weight for origami paper is around 70-80 gsm (grams per square meter). This strikes a good balance between being thin enough to fold precisely and strong enough to hold its shape. For a beginner-friendly Ancient Dragon, a starting square of 20cm x 20cm (or 8 inches x 8 inches) is a good size. This gives you enough room to maneuver your folds without feeling cramped, but it’s not so large that it becomes unwieldy. If you’re feeling adventurous or want a more detailed dragon, you can go larger, perhaps 30cm x 30cm. Smaller sizes are possible but will require very precise folding.
Single or Double-Sided Paper?
The Ancient Dragon looks fantastic with single-colored paper, where the entire dragon will be one hue. However, using double-sided paper, with a different color on each side, can add a beautiful visual dimension. For example, you could have a deep red dragon with hints of gold showing on the underside of the wings or the belly. If you’re using double-sided paper, decide which color you want to be the primary color of your dragon (the side that will be mostly visible) and start with that color facing up.
Mastering the Base Folds: Setting the Stage
Before we dive into the dragon itself, we need to create a few fundamental bases. These are like the building blocks of many complex origami models. Precision here will pay dividends later.
The Preliminary Base (Square Base)
This is a very common base and surprisingly simple to achieve cleanly.
1. Start with your square piece of origami paper, colored side down if you’re using double-sided paper.
2. Fold the paper in half horizontally, bringing the bottom edge up to meet the top edge. Crease firmly and unfold.
3. Now, fold the paper in half vertically, bringing the left edge over to meet the right edge. Crease firmly and unfold. You should now have two perpendicular creases forming a cross.
4. Flip the paper over so the colored side is facing up.
5. Fold the paper in half diagonally, bringing the bottom-right corner up to meet the top-left corner. Crease firmly and unfold.
6. Fold the paper in half diagonally again, bringing the bottom-left corner up to meet the top-right corner. Crease firmly and unfold. You should now have an ‘X’ crease on this side, intersecting the horizontal and vertical creases from before.
7. Now, hold the paper with the ‘X’ creases facing you. Gently push the left and right sides inwards towards the center along the horizontal crease. As you do this, the top and bottom points will naturally come together. Flatten the paper down into a square. This is your Preliminary Base (or Square Base). You’ll have four flaps meeting at one corner, and the open edges meeting at the opposite corner.
The Bird Base
The Bird Base is another essential foundation, and it’s built upon the Preliminary Base.
1. Start with your Preliminary Base, with the open end pointing away from you.
2. Take the top layer’s right flap. Fold its bottom edge so it aligns with the center vertical crease. Crease firmly.
3. Repeat this with the top layer’s left flap. Fold its bottom edge to align with the center vertical crease. Crease firmly. You should now have a kite shape on the top layer.
4. Now, take the top triangular flap that’s above these two folds. Fold it down over them, aligning its bottom edge with the top edges of the two kite flaps. Crease firmly and then unfold this small triangle. This crease is a guide.
5. Unfold the two kite flaps you just made.
6. Now, lift the bottom point of the top layer upwards. Using the creases you just made as guides, ‘petal fold’ this section. This means you’ll open up the paper and fold the sides inwards along the existing creases, bringing the bottom point all the way up to the top point. Flatten everything down. This is called a petal fold.
7. Flip the entire model over.
8. Repeat steps 2-6 on this new side. Fold the bottom edge of the right flap to the center crease. Fold the bottom edge of the left flap to the center crease. Fold the top triangle down and unfold. Unfold the kite flaps. Then, lift the bottom point of the top layer and petal fold it upwards, using the creases to guide the sides inwards.
You should now have the Bird Base. It has two pointy ‘legs’ at the bottom and two pointy ‘wings’ on the sides.
The Ancient Dragon: A Step-by-Step Journey
Now, let’s bring our dragon to life! Remember to crease firmly at every step.
1. Begin with your Bird Base, with the two ‘legs’ pointing downwards.
2. Take the right flap of the Bird Base (one of the side ‘wings’). Fold its bottom edge to align with the center vertical crease. Crease well.
3. Repeat with the left flap of the Bird Base. Fold its bottom edge to align with the center vertical crease. Crease well. You should now have two narrower flaps pointing upwards, with a central point at the top.
4. Flip the model over.
5. Repeat steps 2 and 3 on this side. Fold the right flap’s bottom edge to the center crease, and the left flap’s bottom edge to the center crease.
6. Now, take the top point and fold it down so it meets the bottom point where the two leg-like flaps meet. Crease firmly and then unfold this point. This crease is a guide.
7. Flip the model over.
8. You should see a central vertical crease and two flaps on each side. Take the right-hand flap. Fold its right edge inwards to meet the center vertical crease. Crease well.
9. Repeat with the left-hand flap. Fold its left edge inwards to meet the center vertical crease. Crease well.
10. Flip the model over.
11. Repeat steps 8 and 9 on this side. Fold the right-hand flap’s right edge to the center crease, and the left-hand flap’s left edge to the center crease.
12. Now, take the model and bring the two bottom ‘legs’ together so they meet at a point. This will cause the paper to open up slightly. Flatten the model so it looks like a long, thin diamond shape with two points at the top.
13. Take the top-right point. This will become the dragon’s head and neck. Fold it downwards and to the right at an angle. This fold determines how long and angled your dragon’s neck will be. Crease firmly.
14. Take the top-left point. This will become the dragon’s tail. Fold it downwards and to the left at an angle. Crease firmly.
15. You now have two long, pointed appendages sticking out from the top. Let’s work on the head. Take the right-hand point (the one you angled down for the neck). Make an inside reverse fold about halfway up this point. To do an inside reverse fold, you’ll open up the fold you just made slightly, push the tip inwards along the crease you want to make, and then re-flatten. This tucks the tip inside, forming the dragon’s head.
16. Now, let’s make the snout. On the head you just formed, make a small inside reverse fold at the tip to create a more pointed snout.
17. Let’s shape the neck. You can make small pleat folds along the length of the neck to give it a more organic, curved appearance. Gently pinch and fold small sections back and forth.
18. Now for the wings. Look at the sides of your model. You should see two flaps that can be pulled outwards and downwards. Gently pull these flaps outwards. To get them to stay, you can make a small fold at the base where they attach to the body. These are your wings. You can shape them further by making small pleats or by gently curving them.
19. For the legs (the two points that were originally the ‘legs’ of the Bird Base). You can leave them as is, or you can make a small fold at the tip of each to create little feet. You can also choose to fold them inwards slightly to tuck them under the body, or even pull them outwards to look more like they’re standing.
20. Take the tail (the point you angled down to the left). You can shape this in various ways. A simple way is to make a few small pleats along its length to give it some texture. You can also bend it into a curve.
Congratulations, you’ve folded your Ancient Dragon!
Common Pitfalls and How to Avoid Them
Even experienced folders make mistakes, so don’t worry if you encounter any issues. Here are some common ones:
- Not creasing firmly enough: This is probably the most common beginner mistake. Origami relies on crisp creases to hold its shape. When you make a fold, press down firmly with your thumbnail or a bone folder (if you have one). This ensures the paper stays folded and the subsequent folds are easier and more accurate. If your folds are loose, your dragon might look soft and less defined.
- Misinterpreting the Petal Fold (in the Bird Base): The petal fold can be tricky. The key is to use the creases you made as guides. When you lift the bottom point, the sides should naturally want to fold inwards along those creases. If it’s not working, gently adjust the paper, ensuring the edges align with your guide creases. Don’t force it; let the creases do the work.
- Struggling with Inside Reverse Folds: These are essential for the head and snout. The key is to make the initial crease *before* doing the inside reverse fold. Then, open the fold slightly, push the tip inwards along that crease, and re-flatten. Think of it like tucking something away neatly inside the existing fold. If you try to do it without a clear initial crease, it becomes much harder to control.
Making Your Dragon Unique: Variations and Personalization
The beauty of origami is its endless potential for variation!
- Size: As mentioned, starting with a larger square will result in a larger dragon. Conversely, a smaller square will give you a smaller, more intricate dragon. For smaller sizes, extra precision is key!
- Paper Patterns: Don’t be afraid to experiment with patterned origami paper. Papers with subtle textures, metallic finishes, or even traditional Japanese patterns can make your dragon look truly ancient and special.
- Color Combinations: If you’re using double-sided paper, try different color combinations. A black dragon with red accents on the wings, or a green dragon with gold details, can create stunning visual effects.
Displaying and Gifting Your Ancient Dragon
Your finished dragon is a work of art!
- Display: Place your dragon on a shelf, desk, or mantelpiece. It looks particularly striking when placed alongside other origami models or natural elements like smooth stones or dried leaves. You can also use a thin wire to suspend it, making it look like it’s flying.
- Gifting: An origami dragon makes a thoughtful and unique gift for birthdays, holidays, or just because. It’s a symbol of strength and good fortune. You can present it nestled in a small box, perhaps with a handwritten note explaining its significance. For an extra special touch, consider framing a very small, exquisitely folded dragon.
Folding this Ancient Dragon is a journey. Take your time, be patient with yourself, and enjoy the process of transforming a simple sheet of paper into a mythical creature. Happy folding!
Conclusion
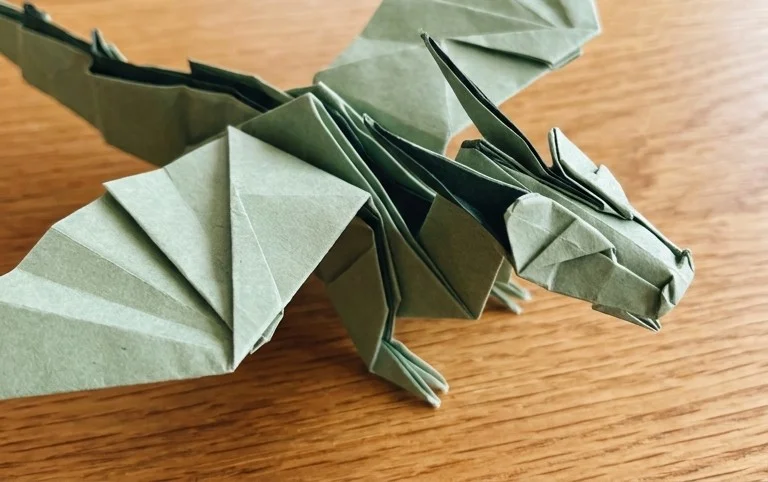
Congratulations on folding your Ancient Dragon! We hope you enjoyed bringing this majestic creature to life. Don’t worry if your first attempt isn’t perfect; origami is a skill that improves with practice. Treat your first dragon as a stepping stone! We’d love to see your finished creation, so feel free to share it with friends or family. Once you’ve mastered this design, consider trying it with different colored paper for a vibrant look, or perhaps scaling it down for a tiny, intricate beast. There are so many more exciting paper projects waiting for you to explore!