Easy DIY Tissue Paper Flowers: Step-by-Step Paper Craft
DIY Paper Flowers are such a delightful way to bring a touch of beauty and handmade charm into your home! Today, we’re diving into a fantastic tutorial to create stunning tissue paper flowers. Imagine delicate, layered petals unfurling to form vibrant blooms, perfect for brightening up any space or adding a personal touch to a gift. This project is absolutely perfect for complete beginners, wonderful for kids to get creative with, and a fantastic way to make thoughtful presents or beautiful decorations. You can whip up a whole bouquet in about 15-20 minutes per flower! Throughout this tutorial, you’ll learn simple folding and shaping techniques to bring your tissue paper to life, transforming flat sheets into gorgeous, three-dimensional blossoms. Get ready to unleash your inner artist and let’s get crafting!
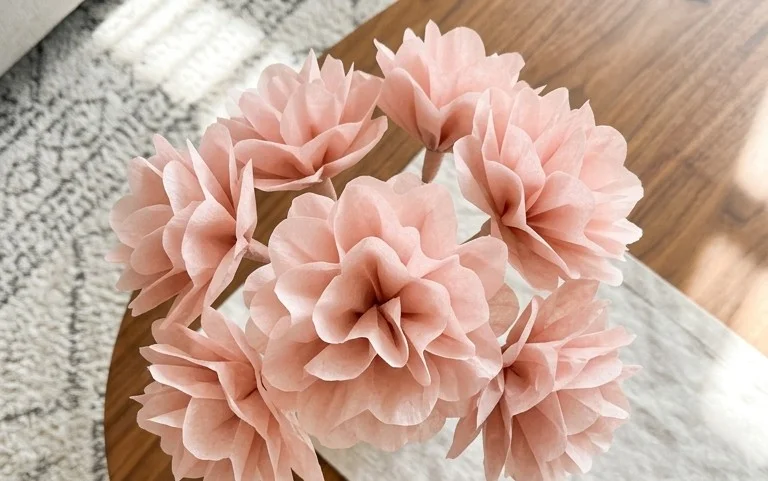
This origami tutorial will guide you through the delightful process of creating beautiful tissue paper flowers. These delicate blooms are surprisingly easy to make and add a charming, handcrafted touch to any occasion. We’ll cover everything from choosing the right paper to adding your own creative flair.
Choosing Your Tissue Paper
The beauty of tissue paper flowers lies in their ethereal quality, and the right paper choice is key to achieving that. For this project, I highly recommend using standard crafting tissue paper.
Type and Weight
Standard crafting tissue paper is wonderfully thin and translucent, which gives our flowers a lovely, airy feel. It’s also flexible and forgiving, making it ideal for beginners. You don’t need anything fancy or specialized. If you happen to find yourself with slightly thicker decorative tissue paper, it will still work, but the petals might appear a little more rigid. Avoid very waxy or coated tissue papers, as they can be difficult to fold and manipulate.
Size
The most common size for crafting tissue paper sheets is around 20 inches by 20 inches. This size works perfectly for creating a generous, multi-petaled flower. If you can only find smaller sheets, don’t worry; you can simply adjust the final size of your flower. Larger sheets will naturally result in larger flowers, while smaller sheets will produce smaller, more delicate blooms. It’s all about proportionality.
Single or Double Sided
For tissue paper flowers, whether the paper is single or double-sided doesn’t really matter. Most crafting tissue paper is either single-sided with a slightly matte finish on one side and a bit more sheen on the other, or it’s uniformly colored and effectively double-sided in appearance. The translucency of the paper will allow the color to show through regardless, and any slight difference in sheen won’t be noticeable once the flower is assembled. The focus is on the color and the way the paper drapes and folds.
Base Folds: The Foundation of Your Flower
Before we start folding the petals, we need to create a strong and symmetrical base. The foundation of our tissue paper flower involves two main folds.
The Square Fold
This is the very first step, and it’s crucial for ensuring your flower has a balanced shape.
Start with your sheet of tissue paper laid flat on a clean, hard surface. Make sure it’s facing you in the orientation you want the color of your flower to be. If one side is slightly shinier than the other, decide if you want that side facing up or down. For most projects, it doesn’t make a significant difference.
Now, take the bottom edge of the paper and bring it up to meet the top edge precisely. Line up the corners as perfectly as you can. Gently crease along the fold line. You should now have a rectangle.
Next, take the right edge of this rectangle and bring it over to meet the left edge. Again, align the edges and corners as neatly as possible. Press down firmly along this new fold to create a sharp crease. You should now have a perfect square. Take your time with this step; the cleaner your initial square, the more symmetrical your final flower will be.
The Diagonal Fold
This fold establishes the framework for our petals.
With your square of paper in front of you, locate the bottom right corner. Take this corner and bring it across to meet the opposite corner, the top left corner. Ensure the two corners meet exactly and the edges align. Run your finger firmly along the diagonal edge to create a crisp crease. You should now have a triangle, with the longest edge being the folded crease.
The Fold Sequence: Crafting Your Petals
Now, let’s get to the fun part: folding the petals! We’ll work with the triangle you just created.
1. Place your triangle so the long folded edge is at the top and the point is facing downwards.
2. Imagine a line running vertically from the top folded edge straight down to the bottom point. We’re going to fold the two side points towards this imaginary line.
3. Take the right corner of the triangle (the one on the right side of the folded edge). Bring this corner inwards towards the center line. You want to fold it so that the point of this corner touches the bottom point of the triangle. When you’ve done this, the edge that was originally the right side of your triangle should now run roughly parallel to that imaginary center line.
4. Crease this fold firmly.
5. Now, repeat the exact same fold with the left corner. Take the left corner of the triangle and bring it inwards towards the center line. Again, aim to have this point touch the bottom point of the triangle. The left edge of your original triangle should now also run roughly parallel to the imaginary center line.
6. Crease this fold firmly. You should now have a shape that looks a bit like a kite or a narrow diamond. The two points that were originally on the bottom corners are now meeting at the bottom point.
7. Turn the entire model over. You should see a similar kite-like shape.
8. Now, we’re going to create the individual petals. Take the top layer of the right “wing” of the kite. We want to fold this section outwards, creating a petal shape. Bring the right edge of this wing outwards and downwards, so that the folded edge curves gently. The goal is to create a petal that is rounded at the top and tapers slightly towards the bottom. A good guide is to fold it so the tip of the petal extends slightly past the original right edge of your kite shape. Experiment a little here to find a petal shape you like. The key is consistency.
9. Crease this fold carefully.
10. Repeat this petal fold on the left side. Take the top layer of the left “wing” and fold it outwards and downwards, mirroring the petal you just created on the right side. Try to make it as symmetrical as possible.
11. Crease this fold carefully.
12. Now, carefully turn the model over. You should see two newly formed petals on this side.
13. Take the right bottom point of your kite shape and fold it upwards, just slightly, to tuck under the base of the petals you just created. This helps to secure the folds and gives the flower a neat base. This is a small tuck, about half an inch or so.
14. Crease this small fold.
15. Turn the model over again. You should see the other side of the petals you created.
16. Repeat the tuck on this side. Take the left bottom point and fold it upwards, slightly tucking it under the base of the petals.
17. Crease this small fold.
You’ve now created the basic structure of your tissue paper flower! To complete it, you’ll gently open up the petals. Gently pull the two sides of the flower apart, and the petals will naturally unfurl. You can fluff them out to your desired fullness.
Common Pitfalls and How to Avoid Them
Even with the simplest origami, beginners can encounter a few common challenges. Here’s how to navigate them:
1. Sloppy Initial Folds
This is the most common mistake and impacts every subsequent step.
* **The Problem:** Not aligning edges and corners precisely in the initial square and diagonal folds. This leads to an asymmetrical base, making it difficult to fold the petals evenly.
* **How to Avoid It:** Slow down! Lay your paper flat on a smooth surface. When bringing edges together, visually check that the corners match up perfectly before making the crease. Run your fingernail or a bone folder along the fold line to create a sharp, defined crease. Don’t be afraid to unfold and refold if it’s not quite right. A clean, precise start makes everything else so much easier.
2. Uneven Petal Folds
The petal folds are where the artistry comes in, and inconsistency here is noticeable.
* **The Problem:** Folding the petal sections outwards at different angles or to different lengths on each side of the flower.
* **How to Avoid It:** Think of mirroring. When you fold the right petal, take a mental note of its size and angle. Then, on the left side, try to replicate that exact fold. If you can, hold the paper up to a light source to see if the two petals are roughly the same size and shape. It’s okay if they aren’t perfectly identical; nature isn’t always symmetrical! But strive for a close resemblance. Also, ensure you are folding the *top layer* of the “wing” for the petal, not the entire thickness.
3. Over-Creasing or Tearing the Tissue Paper
Tissue paper is delicate, and it’s easy to get carried away with creasing.
* **The Problem:** Pressing too hard when creasing, especially on the delicate petal folds, can lead to tears or visible damage to the paper.
* **How to Avoid It:** Be gentle but firm. For most creases, a firm run of your fingernail is sufficient. If you’re worried about tearing, use the side of your fingernail rather than the tip, or use a specialized origami tool like a bone folder. Remember, tissue paper is meant to be soft and flowing; you don’t need to create knife-sharp creases on every fold, especially the petal folds. A gentle shaping is often more effective.
Varying Your Flowers: Creative Touches
Once you’ve mastered the basic fold, the possibilities for customization are endless!
Size Variations
As mentioned earlier, the initial size of your paper sheet directly influences the final size of your flower. Start with a smaller square of tissue paper for miniature blooms, perfect for embellishing cards or gift tags. For larger, statement flowers, use a larger sheet. You can even experiment with cutting down standard sheets to create custom sizes.
Paper Patterns and Colors
This is where you can really let your personality shine!
* **Color Combinations:** Don’t be afraid to mix and match colors. You could use a base color for the outer petals and a contrasting color for the inner ones by layering two sheets of tissue paper together before you start folding.
* **Patterned Tissue Paper:** While less common, you can find patterned tissue paper. If you do, consider how the pattern will look when folded. Delicate, repeating patterns often work best.
* **Metallic Accents:** Tissue paper with metallic flecks or a subtle metallic sheen can add a touch of glamour to your flowers, making them perfect for celebrations.
* **Ombre Effects:** Some tissue papers come with a gradient of color. Using these can create beautiful ombre petals.
Adding a Stem and Leaves
For a more realistic look, you can easily add a stem and leaves.
* **Stems:** Use floral wire wrapped in green floral tape, or simply a thin green pipe cleaner. Gently insert the stem into the base of the flower, securing it with a dab of glue if needed.
* **Leaves:** Cut leaf shapes from green cardstock or construction paper. You can even fold small leaves from green tissue paper using similar techniques to create a softer look. Attach these to the stem.
Displaying and Gifting Your Creations
These beautiful tissue paper flowers aren’t just pretty; they’re also incredibly versatile for display and gifting.
Display Ideas
* **Vases:** Arrange a bouquet of your tissue paper flowers in a vase for a stunning, long-lasting centerpiece. Mix different sizes and colors for a lush, dynamic display.
* **Wreaths:** Glue your flowers onto a wreath form to create a charming, custom decoration for your door or wall.
* **Garlands:** String several flowers together to create a festive garland for parties or seasonal decor.
* **Table Scatter:** Use smaller flowers as a whimsical scatter on a party table or around a cake.
* **Shadow Boxes:** Frame your delicate blooms in a shadow box for a unique piece of wall art.
Gifting Ideas
* **Gift Toppers:** A single, perfect tissue paper flower can elevate any gift. Tuck it under ribbon or glue it directly onto the package.
* **Bouquets for Friends:** Surprise a friend or loved one with a handmade bouquet. It’s a thoughtful and personalized gesture that requires no watering!
* **Party Favors:** Small tissue paper flowers can be given as delightful party favors.
* **Wedding Decor:** If you’re planning a wedding or event, these flowers are budget-friendly and beautiful for centerpieces, aisle decor, or hair accessories.
* **”Thinking of You” Gestures:** Sometimes, the simplest gifts are the most meaningful. A small bunch of flowers made with care can brighten someone’s day.
Creating these tissue paper flowers is a relaxing and rewarding craft. Don’t be discouraged if your first few aren’t perfect. With a little practice, you’ll be creating a beautiful garden of paper blooms in no time! Enjoy the process, and most importantly, have fun with your creativity.
Conclusion
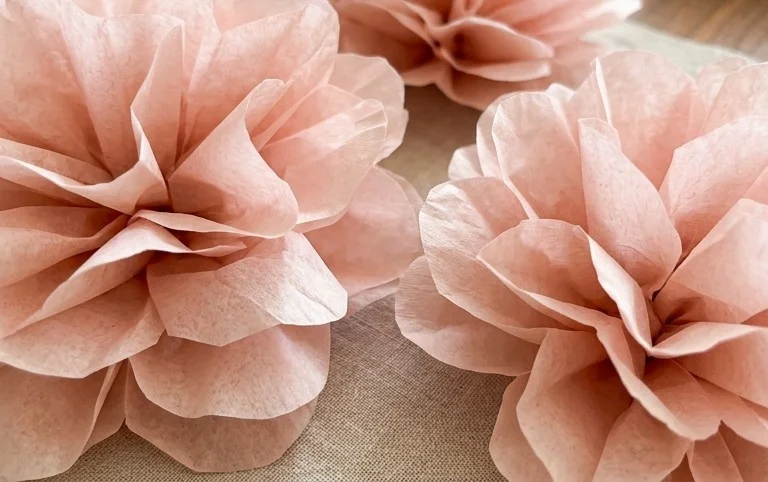
Congratulations on completing your beautiful DIY paper flowers! We hope you enjoyed this tissue paper origami tutorial. Don’t worry if your first attempt isn’t perfect; every fold is a learning experience and practice makes perfect. Feel free to share your stunning creations with friends and family – they make wonderful gifts or decorations!
For your next crafting adventure, why not try a different size tissue paper for varied blooms, or experiment with adding a wire stem for a more realistic look? We invite you to explore our other paper projects for even more creative fun!