Easy Origami Bat: 8-Step Halloween Paper Craft
Origami Bat: Easy Halloween Paper Tutorial In 8 Steps is your gateway to a spooktacularly simple craft! Imagine a charming little bat, its wings outstretched, ready to perch on your bookshelf or flutter amongst your Halloween decorations. This is the perfect project for complete beginners, kids, or anyone looking for a quick and delightful way to get into the festive spirit. In under 15 minutes, you’ll be amazed at how easily you can transform a single piece of paper into this adorable creature.
Throughout this tutorial, I’ll guide you step-by-step, focusing on clear, concise instructions to make folding your origami bat a breeze. You’ll learn fundamental origami folds that are not only fun but will build your confidence in paper folding. Let’s grab some paper and get ready to create something wonderfully eerie!
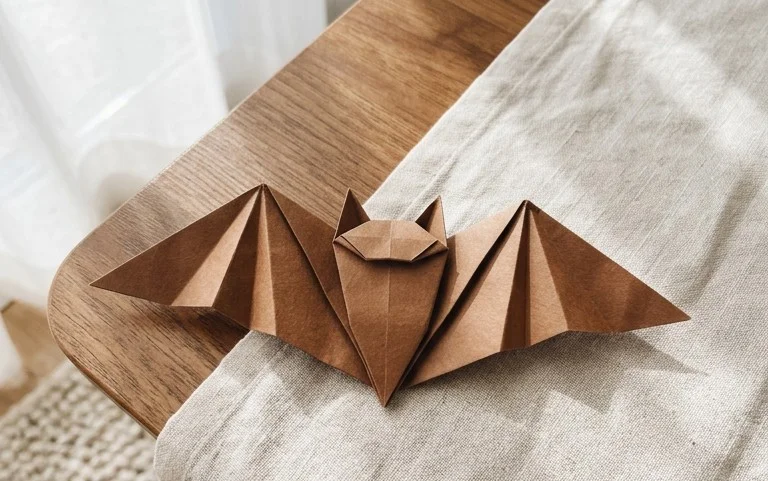
Origami Bat: Easy Halloween Paper Tutorial In 8 Steps
Hello there, fellow crafters and Halloween enthusiasts! Today, we’re going to embark on a fun and surprisingly simple origami adventure to create our very own spooky, yet cute, origami bat. This project is perfect for beginners, and with just eight steps, you’ll have a delightful paper creature ready to add a touch of Halloween magic to your home. Let’s get started!
Choosing Your Paper
The first step in any origami project is selecting the right paper. For our origami bat, you don’t need anything fancy, but a few choices will make the process smoother and the result more appealing.
Paper Type and Weight
Standard origami paper is ideal. It’s thin enough to fold precisely without becoming too bulky, yet strong enough to hold its shape well. If you don’t have dedicated origami paper, regular printer paper will also work. However, be aware that printer paper is a bit thicker, so you might need to press your folds a little firmer. Avoid cardstock or construction paper, as these are too thick for intricate folds and will make your bat difficult to assemble.
Paper Size
For this bat, a 6-inch by 6-inch (15 cm x 15 cm) square of paper is a great starting point. This size is manageable for beginners and creates a bat that’s neither too small to be fiddly nor too large to be unwieldy. If you’re feeling ambitious, you can certainly experiment with larger or smaller squares later.
Single vs. Double-Sided Paper
This is where we can add a touch of personality to our bat! You can use single-sided origami paper, where one side is coloured and the other is white. If you use single-sided paper with the coloured side facing up to start, your bat will have a coloured body and white wings. Alternatively, you can use double-sided paper, where both sides are coloured, resulting in a fully coloured bat. For a classic spooky look, black or deep purple paper is perfect. If you want something a bit more whimsical, consider a Halloween-themed patterned paper, but make sure the pattern isn’t too busy, as it can sometimes obscure the folds.
The Base Folds
Before we dive into the bat’s specific folds, let’s get familiar with two fundamental origami folds that will be crucial for this project. Practicing these will ensure your final bat is neat and well-defined.
The Valley Fold
A valley fold is the most common fold in origami. Imagine you’re folding a piece of paper in half to create a “V” shape. You bring two edges or corners together, and the crease runs down the middle, forming a valley. To make a clean valley fold, align the edges or corners as precisely as possible, and then run your fingernail or a bone folder firmly along the crease line. This “burnishing” action creates a sharp, defined crease that will make subsequent folds much easier.
The Mountain Fold
A mountain fold is the opposite of a valley fold. Instead of creating a “V” shape, it creates an inverted “V” or an “M” shape when viewed from the side. You’ll typically make a mountain fold by first creating a valley fold and then unfolding the paper. Then, you’ll fold the paper back in the opposite direction along the same crease line. Again, clean alignment and firm pressure are key to a good mountain fold.
Your 8-Step Origami Bat Sequence
Now that we’ve prepared our paper and are comfortable with the basic folds, let’s bring our bat to life! We’ll start with the coloured side of your paper facing up, if you’re using single-sided paper.
Step 1: Begin by making a valley fold down the middle of your square paper. Bring the bottom edge up to meet the top edge and crease firmly. Unfold the paper.
Step 2: Now, make another valley fold, this time bringing the left edge over to meet the right edge. Crease firmly and then unfold the paper. You should now have two intersecting creases forming a plus sign in the center of your square.
Step 3: With the coloured side still facing up (or the side you want to be the inside of your bat facing up), bring the top point of the paper down to meet the center point where your creases intersect. Crease firmly. Then, bring the bottom point of the paper up to meet the same center point and crease firmly. Your paper should now look like a kite shape with the top and bottom points folded inwards.
Step 4: This step forms the head and upper body of our bat. Take the top point that you just folded down and fold it down again, so that the very tip of that point lands about an inch (or about 2-3 cm) above the horizontal center line of your paper. The crease you make here should be parallel to the top edge of your paper before you folded it in Step 3. This fold creates the top of the bat’s head.
Step 5: Now we’re going to shape the ears. Take the top layer of the paper at the left and right sides, just below where you made the fold in Step 4. You want to bring the outer edges of these sections inwards at an angle, so they meet along the central vertical crease. Imagine you’re folding the sides of a diamond inwards to create a narrower diamond shape. Make sharp creases. These will become the bat’s ears.
Step 6: Flip your entire model over so the back side is now facing you. You should see the two points you folded inwards in Step 3. Take the bottom point and bring it up to meet the top point of the model. Crease firmly. This fold forms the basic body shape and the tail of the bat.
Step 7: To create the wings, take the right flap of paper and fold it outwards and downwards at an angle. The top edge of this fold should align roughly with the bottom edge of the main body of your bat. You’re essentially creating the wing shape. Repeat this on the left side, making sure the angles are as symmetrical as possible. The angle of this fold will determine how wide your bat’s wings are.
Step 8: Our bat is almost complete! To give it a little more definition and a slightly rounded bottom, take the very bottom tip of the model and fold it upwards just a small amount, maybe half an inch (or about 1 cm). This subtle fold helps to create a more finished look and prevents the bottom from being too pointed. You’ve done it! Your origami bat is ready!
Common Beginner Pitfalls and How to Avoid Them
Even with a simple design, there are a couple of common spots where beginners can sometimes get a little stuck. Don’t worry if you find yourself making these mistakes; they’re completely normal, and easily avoidable with a little attention.
One frequent issue is not aligning the edges and corners precisely in the initial folds. For instance, in Step 1 and 2, if your initial valley folds aren’t perfectly centered, all subsequent folds will be slightly off. To avoid this, take your time. Hold the edges together and visually check for perfect alignment before making your crease. You can even lightly pinch the center point to ensure it’s exactly in the middle before committing to the crease.
Another area where people sometimes struggle is in Step 7 when folding the wings. If the angles aren’t consistent, one wing might be much larger or shaped differently than the other. The key here is to pay close attention to the angle you’re folding the flap. Try to mirror the fold you make on one side directly onto the other. You can even use your first wing fold as a guide for the second one, ensuring they look like a pair.
Finally, some beginners tend to be a little hesitant with their creases. While it’s important not to rip the paper, origami relies on crisp, sharp creases to hold its shape. If your folds feel loose or your model seems wobbly, go back over your creases and press down firmly with your fingernail or a bone folder. This will significantly improve the stability and appearance of your finished bat.
Varying Your Origami Bat
Once you’ve mastered the basic bat, the fun doesn’t have to stop! Origami is all about creativity, and there are many ways you can make your bat unique.
Size Variations
As mentioned, the size of your initial square dictates the size of your bat. If you want a whole colony of bats, try making some from very small squares (e.g., 3-inch squares) and some from larger squares (e.g., 8-inch squares). This creates a dynamic display.
Paper Pattern and Colour
Experiment with different types of paper! Halloween-themed patterned papers can add a festive touch. You could even try using a paper with a subtle gradient colour, or even foil paper for a bit of sparkle. Don’t forget about traditional colours like black, grey, orange, and purple, but consider other colours too – a lime green bat could be quite striking!
Displaying and Gifting Your Origami Bat
Your finished origami bats are incredibly versatile and can be used in so many delightful ways.
Display Ideas
For a spooky Halloween decoration, string several bats together to create a garland. You can use a needle and thread to carefully poke through the body of each bat and hang them from your mantelpiece or across a window. They also look fantastic attached to walls or doors using a bit of sticky tack. For a more whimsical touch, group them together on a shelf or mantelpiece. You can even stand them up on their own if you’ve creased them well. A single bat can also be a charming accent to your Halloween party table.
Gifting Ideas
These little bats make for perfect small gifts or party favours. Tuck one into a Halloween-themed card for a friend. If you’ve made a smaller bat, it can even be attached to the outside of a gift box as a unique embellishment. They’re also a wonderful way to add a handmade touch to treat bags for trick-or-treaters or at a Halloween party.
I hope you’ve enjoyed making your origami bat! It’s a simple project with a big impact, and I can’t wait to see how you use yours to celebrate the spooky season! Happy folding!
Conclusion
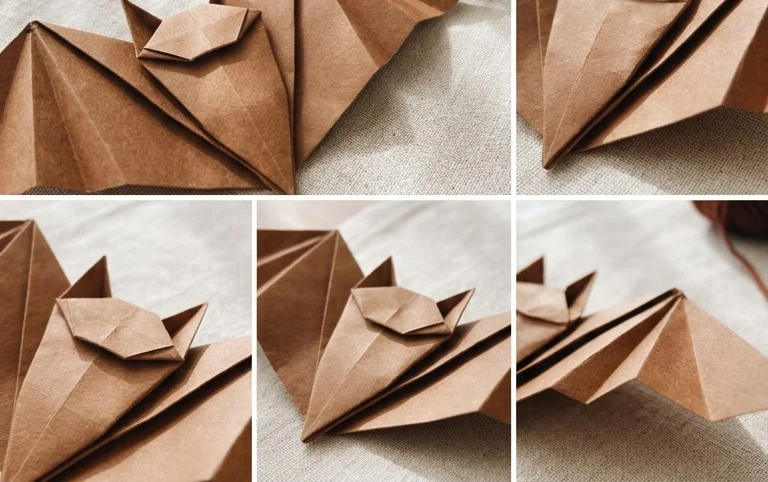
Congratulations on completing your very own origami bat! We hope you enjoyed this easy Halloween paper tutorial. Don’t worry if your first attempt isn’t perfect; origami takes a little practice, and every fold is a step towards mastery. We’d love to see your finished creations – feel free to share them with fellow crafters!
Ready for more spooky fun? Try making your bat in a different color, or perhaps add some googly eyes for an extra-terrifying touch. And if you’re looking for other paper projects, be sure to explore our full collection of tutorials. Happy folding!